
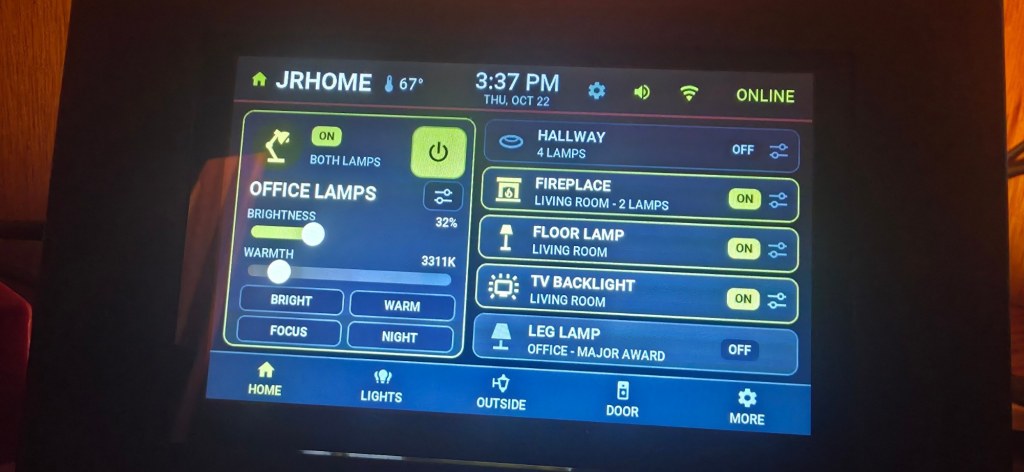
I had an Elecrow CrowPanel 5″ touchscreen that had given me trouble before. Instead of reviving the old firmware, I started over: confirm exactly what the hardware is, prove it works, then build the simplest useful screen on top and grow it one piece at a time.
It’s now running on my desk as a lighting dashboard, a test screen for my Christmas lighting node, and a set of basic controls for the office and the development-rack area. This is how it got there, including the four bugs that a configuration check could never have found.
At a glance
| Panel | Elecrow CrowPanel ESP32 HMI, 5.0 inch, 800×480 (SKU DIS07050H, hardware revision V3.0) |
| Chip | ESP32-S3 with 8 MB of PSRAM, capacitive touch |
| Software | ESPHome with its native Home Assistant API and built-in LVGL graphics. No MQTT, no cloud. |
| Role | Display and send commands only; Home Assistant stays in charge |
| Today | Office lamps, hallway, fireplace, floor lamp, TV backlight, an outside page, a front-door status page and Christmas looks |
1. Know exactly which board you have
Elecrow makes three hardware revisions of this panel, and the pin map and startup sequence differ between them. I confirmed mine was the V3.0 board from a photo of the back of the PCB and the chip’s own ID, before flashing anything.
2. Prove the hardware, then start fresh
Before any custom code, I saved a full backup of the board’s original contents, then flashed Elecrow’s official firmware (checked against the vendor’s repository before flashing) and checked everything by hand: clean display, backlight, touch aligned across the whole screen, three cold boots in a row and a reset-button reboot. All passed, so any later problem would be mine, not the hardware’s.
I treated my old firmware as evidence only, not a starting point.
3. Four bugs a schema check can’t catch
ESPHome can validate a config in seconds, and mine passed. Four real problems showed up only when I compiled and flashed:
- A setting in the wrong place. A build option I’d put at the top level of the file has to live under the
esphome:section, or it’s silently ignored. - A type error. A line choosing between two text strings failed to compile, because the graphics code wanted a proper string object and the two literals were a different type. Wrapping both in
std::string(...)fixed it. - A silent logger. I’d selected the generic ESP32-S3 board profile, which sends logs out of a USB port this panel doesn’t have. The panel’s one USB-C port goes through a separate serial chip, so my logs were going nowhere. Pointing the logger at the hardware UART fixed it.
- Touch did nothing at all. The default touch chip address initialized without any error and produced no response. The alternate address was worse: it reported a calibration error and marked the touch component failed. The real fix was Elecrow’s own documented reset sequence: a few register writes to an onboard I/O expander that reset the touch controller in the right order at boot. Once I ran that at startup, touch worked.
One lesson that wasn’t a config fix: for a while it looked like state feedback was broken. The panel showed UNKNOWN and the log stayed silent when things changed. But per-change logging in ESPHome is at DEBUG level, and I was watching INFO. The panel itself had been right all along. When the log and the screen disagree, check the screen.
4. The one rule
A tap only sends a command. The tile changes its look only when Home Assistant reports the new state. If a device is unavailable, the tile says so and ignores touch. If the panel can’t reach Home Assistant at all, an overlay covers everything and blocks touch until it reconnects.
That rule is the whole reason the panel can be trusted: what it shows is what Home Assistant says, not what it hopes happened.
5. Don’t pretend while you wait
Early on, some of my Govee lights were slow to confirm a change, because they reported their state through Govee’s cloud. That delay isn’t an issue anymore, but it taught the panel a good habit: when a command is still waiting on Home Assistant, the screen doesn’t act as if it already worked. It waits for the real answer.
6. Growing it without breaking it
I added to it one small version at a time, keeping my original working version untouched as the rollback:
- Text. My first screens looked jagged because ESPHome fonts default to 1 bit per pixel. Switching to 4-bit antialiased fonts fixed it.
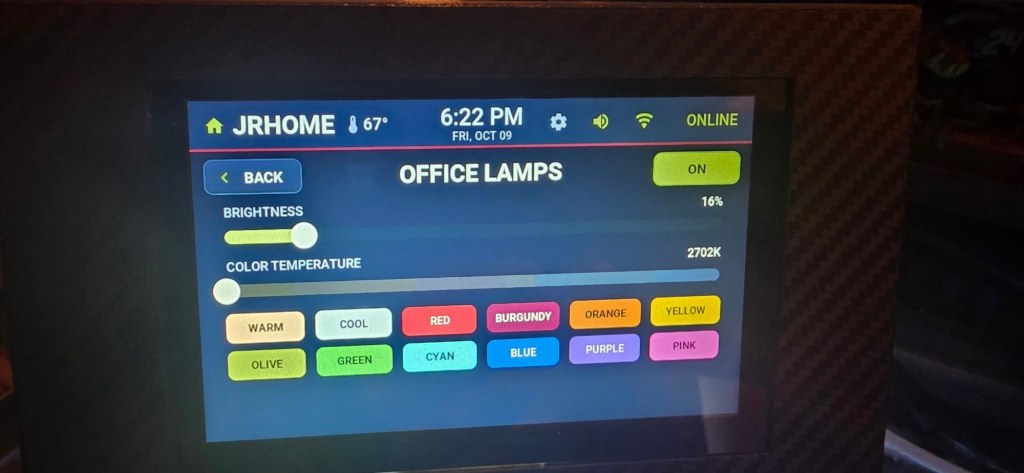
- Controls pages. Long-press a light for brightness, color temperature and color chips. The tap toggles; the long press never does.
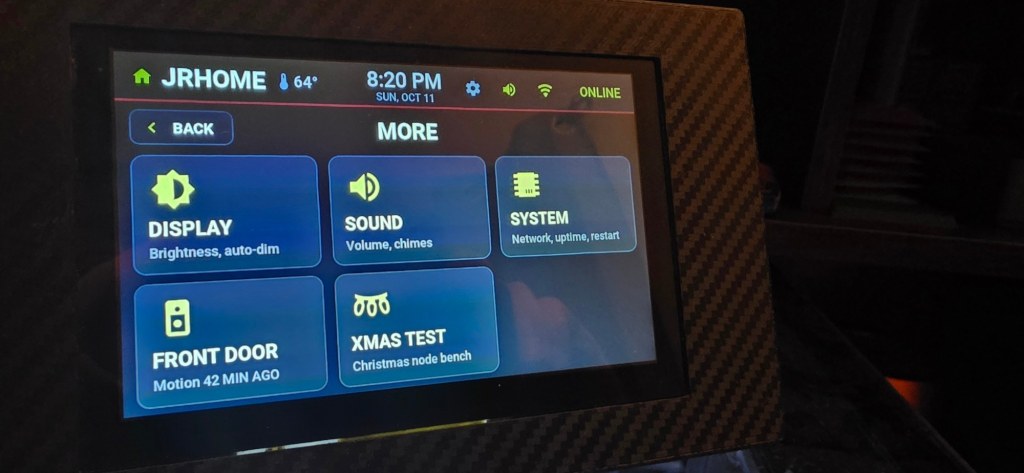
- Display settings. A backlight slider, auto-dim and screen-off timers, and an invisible full-screen shield that swallows the first touch, so waking the screen never presses whatever was underneath.
- A front-door tile. Last ring, motion and battery from Ring, through Home Assistant.
- Icon glyphs. The ALL OFF button showed an empty box for several versions because that icon wasn’t in my 28-pixel font. Fonts only contain the glyphs you tell them to.
- Flash budget. Each new light with its own controls page costs about 1% of the app’s flash. By one of the later versions I was at roughly 80%, so plan before adding many more.
7. A test screen for the Christmas node
When I added my Christmas lighting node (a WLED controller) to Home Assistant, I wanted a way to commission it from my desk before it went near the main touchscreen. So the panel got a bench test page: power, brightness, big RED, GREEN, BLUE and WHITE buttons, and a line reminding me that RED has to look red on the strip, or the color order is wrong in WLED.
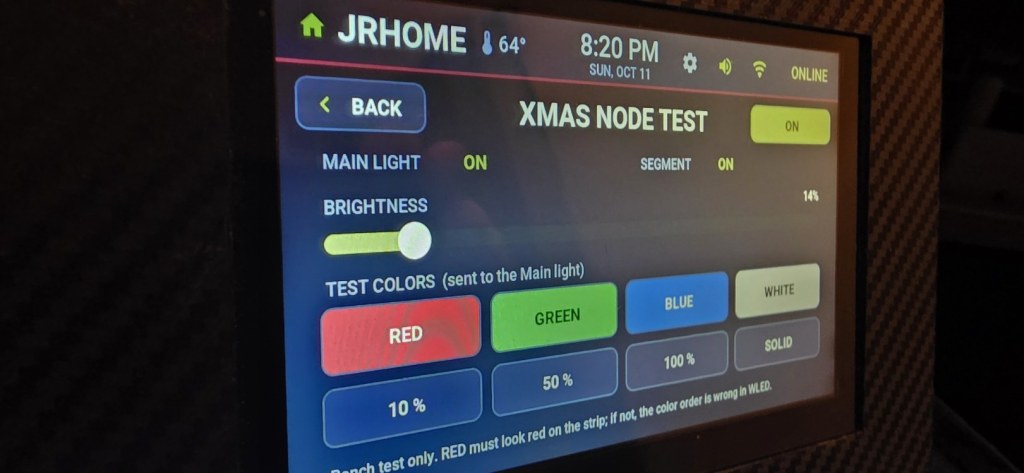
The first version had a bug worth knowing about. Power and brightness worked, but the colors didn’t. WLED exposes two lights to Home Assistant: a main light and a segment light, and the main light takes power and brightness but not color or effect. I’d sent everything to the main light. Sending colors and effects to the segment light fixed it. Later versions of the page grew a list of Christmas looks, 40 of them at last count, to pick from.
8. Gotchas
- Build on native Windows PowerShell, not Git Bash. ESP-IDF rejects the MSYS path handling.
- Keep your known-good build. I kept version 1 untouched and each later version checkpointed, so a bad flash is a quick rollback.
- Check the hardware before blaming the firmware. At one point the panel’s speaker header was empty, so my sound code was silent. That was a missing part, not a bug.
- I never ran an isolated Wi-Fi outage test. Reconnecting relies on ESPHome’s built-in behavior, which I’ve watched work many times over many reflashes, but I haven’t deliberately cut the router to prove it.
What it’s for now
It’s a small, dedicated screen that does a few jobs well. It handles basic lighting controls for the office and the development rack area, it shows me the front door, and it’s where I test Christmas looks before they go anywhere else. Home Assistant stays the brain; this is just a window and a handful of buttons.


Leave a Reply